Unit 1 Aura : The Helmet That You Don’t Know You Need

Electric skateboarding is still a niche activity, which means riders often struggle to find protective gear specifically designed for the sport. The choice usually comes down to bicycle helmets or motorcycle helmets—and motorcycle options are too heavy for casual riding. So when UNIT 1 sent us their AURA smart helmet with integrated lighting and crash detection, we decided to put it through its paces.

Let’s see if the AURA is the urban e-skate helmet riders have been waiting for.


First Impressions: Design & Build

The AURA looks genuinely impressive right out of the box.

Design highlights:

  • Clean, minimalistic aesthetic
  • Low-profile, lightweight construction
  • Reminiscent of premium urban helmets like Bern
  • Doesn’t look overly aggressive or bulky
  • Wearable for daily casual use (bicycles, e-bikes, scooters, e-skates)

The design philosophy is refreshing. Unlike heavy motorcycle helmets or aggressive mountain bike helmets, the AURA feels approachable and socially acceptable for urban riding. It has a premium look without feeling like you’re wearing specialized sporting equipment.


Safety: The Critical Question for E-Skate Riders

Here’s the hard truth: electric skateboards are riskier than bicycles. Speeds can easily reach 50-60 km/h (30-37 mph), so helmet choice matters.

Most experienced e-skate riders opt for mountain bike helmets with MIPS protection (Multi-Directional Impact Protection System). MIPS is a low-friction layer inside the helmet that reduces rotational force during angled impacts—basically, it lets the helmet shift slightly and absorb rotational energy instead of your head twisting violently during a crash.

(Photo of bulky MTB helmet with MIPS)

Good news: The AURA also features MIPS protection, so you can ride with confidence.

Certifications:

  • MIPS-equipped
  • NTA-8776 certified (e-bike impact protection up to 45 km/h)

The 45 km/h certification sits well with typical e-skate cruising speeds. For speeds above 60 km/h, lightweight helmets like this become more questionable—but you know your riding style best.


Comfort & Fit

The AURA feels exceptional to wear.

Comfort features:

  • Secure head grip with room for slight movement (thanks to MIPS liner)
  • Adjustable retention dial at the back for fine-tuning fit
  • Magnetic buckle that snaps into place easily and releases with a simple sideways slide
  • No fumbling with annoying traditional buckle straps

The magnetic buckle is genuinely satisfying and a quality-of-life upgrade over standard helmet closures.


Integrated Lighting System

This is where the AURA truly shines.

Design Quality:
The lighting integrates beautifully into the helmet without looking cheap or tacked-on. The startup and shutdown animations even display battery levels in a clean, thoughtful way. You can tell serious effort went into the lighting design.

Lighting Modes (via UNIT 1 app):

  • Normal mode – Standard visibility
  • Strobing mode – Maximum visibility for high-traffic areas
  • Eco mode – Intermittent pulsing to extend battery life

Advanced Features:

  • Daylight sensor mode – Automatically reduces lighting intensity during the day to save battery
  • Rain mode – Theoretically switches to strobing during rainy conditions

A word on Rain Mode: While cool in theory, the helmet doesn’t actually detect rain itself. It pulls weather data from your phone’s weather app. If your app says “cloudy” while it’s pouring outside, the helmet has no idea. A bit gimmicky, but the other features more than compensate.


Crash Detection & Safety Alerts

Here’s the genuinely valuable feature that separates this helmet from purely aesthetic smart helmets.

Crash Alert Technology:
When the helmet detects a hard impact or crash, it automatically:

  • Notifies your emergency contacts
  • Sends them your current GPS location

For riders who regularly ride alone, this is a meaningful safety feature. Unlike flashy lighting animations, this is something you hopefully never need—but you’ll be genuinely glad it exists if something bad happens.


Handlebar Remote & Turn Signals

The optional remote control mounts to your handlebars and acts as a turn signal controller for the helmet lighting.

How it works:

  • Press left or right on the remote
  • Helmet displays corresponding turn signals
  • Pairs with optional smart rear light system

The catch for e-skate riders: E-skates don’t have handlebars. You’d need to hold the remote in your hand alongside your e-skate remote, which isn’t ideal. The remote’s accelerometer is designed to detect braking movements to trigger red brake lights—a feature that really shines for bicycle and scooter riders with handlebar mounting.


Additional Features

Magnetic Visor:
Attach a windshield visor magnetically—smooth operation and perfect for cyclists. Less relevant for e-skate riders.


Pricing & Accessories

Here’s where you need to budget carefully.

Base Price:

  • AURA Helmet: $259

The base price is justifiable for a quality helmet with MIPS, proper certifications, and well-designed integrated lighting.

Accessories (where costs add up):

  • Remote control: $39
  • Wind visor: $39
  • Smart rear light system: $89

The ecosystem gets powerful quickly, but the price climbs just as fast. Whether it’s worth it depends on your riding style and budget.


Verdict: Is It Right for You?

The UNIT 1 AURA is a genuinely nice helmet if you:

  • Appreciate casual urban design
  • Ride regularly at night
  • Value integrated safety features
  • Don’t mind premium pricing

As an e-skate helmet specifically? It’s more situational.

The lighting system is excellent. The safety features are legitimate. But some of the smartest features (turn signals, brake detection) really shine for bicycle and scooter riders with handlebars.

However, we genuinely welcome UNIT 1 to the market. There honestly aren’t many helmet options designed with e-skate riders in mind. The AURA is refreshing because it looks good, provides real features, and feels like a proper helmet first and a gadget second.

For casual e-skate riders prioritizing safety and style, the AURA is a solid choice. For aggressive riders regularly hitting 50+ km/h, you might still prefer a dedicated mountain bike helmet with more impact protection.

Either way, the most important thing is wearing a helmet. The AURA makes that choice feel premium.

Ride safe.


If you are interested in buying the Aura, be sure to check out our affiliate discount link here and use code: “ESKATEHQ” to receive $5 off during checkout.
It will help you get a small monetary discount and help us out too. On top of that, you’ll be tagged as an Electric Skateboard HQ customer and probably be treated better. Cheers!

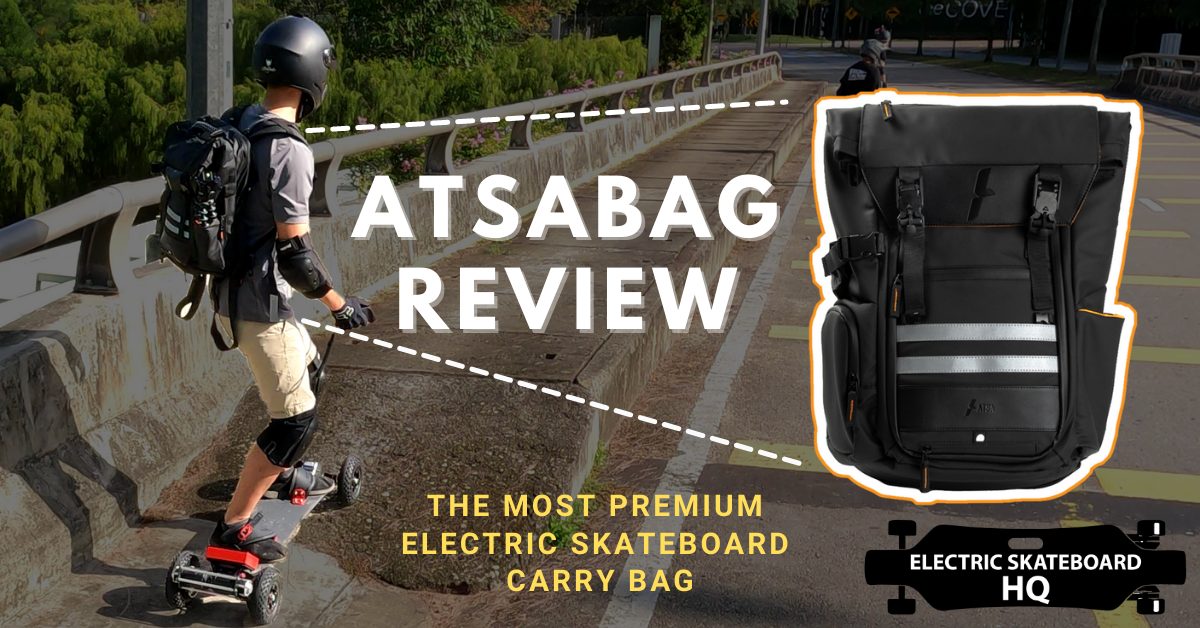
Atsabag Review – A $219 electric skateboard carry backpack

When it comes to electric skateboard bags, we’ve had the opportunity to try a few of them. Today, we will be reviewing the Atsabag, a bag by a brand from Singapore. One thing you should know about Atsabags is that they are expensive. Priced at $219 it’s half of the price of a good entry-level electric skateboard! This eskate hobby isn’t cheap eh. With that said, let’s see if the money is put to good use.

Appearances

When I unboxed the bag, my first reaction was, “Wow! This thing looks pretty!”; and my second reaction was “gosh this is going to be a complicated bag to review.”

Let me explain. The workmanship of Atsa bag is like nothing I’ve seen before. I’m not one that buys or owns any luxury bags, so I’m by no means an expert when it comes to fabrics, but I will describe the material used in an Atsa bag as – it looks beautiful, felt sturdy, and great in the hand, and perfectly sewn together.

Atsa says the bag is waterproof, and looking at the design, I have no doubts about that claim. I got another vanity boost when I took this bag to work and my colleague’s first reaction to seeing the bag was “Wow, cool bag, looks expensive” – well, it certainly has looks that match the price!

Functionality

70% for eskate, 30% for the office

Speaking of carrying the bag to work, I think the Atsa bag was designed specifically to be the perfect bag for your commute to work. The bag is packed full of useful features, including a laptop sleeve, which will be redundant if you are not planning to pack in a laptop or tablet. It used to be removable, well, not anymore 😢.

There are also elastic bands included for cable management, again, something for the office and not the skate park.

Atsabag’s 2 main compartments

The bag has 2 compartments, the back compartment where you carry your skate; and the big rucksack-like front compartment which itself has multiple pouches and is obviously where the once removable laptop sleeve goes. The rucksack-like front compartment can be accessed via the top or the front.

This is a thoughtful design, as top access would be difficult once you have strapped in the board.

Eskate carrying capability

But first and foremost, let’s talk about the board carrying capability of the bag. Atsabags have a very competent system designed to carry boards and hold them snuggly. Even monsters like the Trampa can go in it, but I imagine carrying such a huge board will never be comfortable. I also love how right off the bat, Atsa gave us 2 raincover sizes, for either longboards or shortboards. The rain cover also comes with its own pouches. Neat!

The helmet bag and carrying system are also built into the bag, which is convenient and 100% functional. Again, a neat feature! While carrying a big eskate around is never going to be comfortable, Atsabag did make it as comfortable as possible with the padded shoulder straps. Chest straps and hip straps can be used if you are looking to jump with this thing.

I would say that for carrying an Eskate, it can’t get any more comfortable than this.

Using the Atsabag

So, the ideal use case for an Atsabag is probably skating to and from work, a cafe, or on a grocery run. I imagine pairing an Atsabag with an electric shortboard such as the Meepo Mini 2 would be comfortable enough that you can tolerate an hour’s grocery run while carrying the board on your bag.

Other bells and whistles

Now back to the bag, besides the board carrying capabilities, the bag also has plenty of other features that I love to show off to everyone around me, especially the magnets.

First, there are magnetic buckles that automatically clasp; second, the once removable 17” laptop sleeve that has a magnetic opening to close itself and keep itself closed, then, there is another magnetic snap to lock the laptop sleeve inside the Atsabag; and obviously the top access opening also has a magnetic lining around it to keep it closed too.

Atsabag has about as many magnets as it has pouches, to the point where I have trouble utilizing them all. I especially don’t know what to do with the secret side pocket and the holder for the selfie stick designed for a 360 camera. I don’t have a 360 camera and I mount my GoPro on my helmet.

360 camera goes here

Summary:

So, after using this bag for a while, here are my thoughts:

If you are looking for a bag to carry your eskate during your commute to and from work, Starbucks, the shopping mall etc., Atsabag is perfectly designed for that. If you just want a bag to carry your board to and from your skate location, the Atsabag is again perfect for it but could be overkill, as you will likely only be using 70% of its full functionality; and if you just want a bag that looks really expensive to show off, Atsabag certainly has the look to do that for you as well. It is, after all, one of the most premium electric skateboards carry bags you can get out there.

Thanks, Atsa, for letting me review this! Now I know how the ladies feel when carrying around their LV bag.

If you are interested in buying an Atsabag, be sure to check out our affiliate discount link here and uses code: “ESKATEHQ” during checkout. It will help you get $20 off and helps us out too.

On top of that, you’ll be tagged as an Electric Skateboard HQ customer and probably be treated better. Cheers!
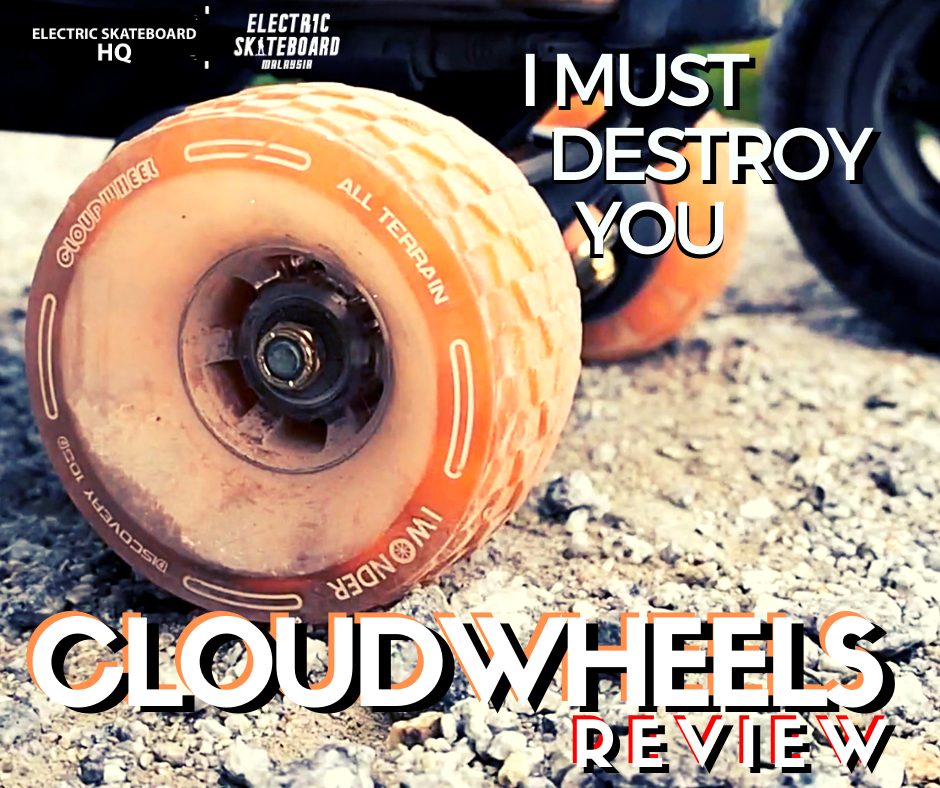
Cloudwheels Review – I must break you. Will I?

This content is brought to you by our dear friend from Electric Skateboard Malaysia.

Cloudwheels, are they any good? Do they actually feel like riding on the clouds?

Today we, Electric Skateboard Malaysia, are going to go over the all-new Discovery Cloudwheels, from iWonder, and let you know what we think of them!

We tested the 105mm Cloudwheels on an Exway Riot Flex over the course of about 187 miles, or 300 Kilometres. Since iWonder markets these as ‘All Terrain’ wheels, I tested them on just about every terrain possible. After all that testing, today I’m going to tell you all about the strengths and weaknesses of the Cloudwheels.

Let’s get started!

Discovery Cloudwheels – The Pros and Cons

The Cloudwheels really excel on rough roads. Riding them on those conditions you can feel the difference compared to normal street wheels. They absorb road vibrations very well and had no problem going through cracks and potholes. They call this cushioning effect ‘damping core technology’. I have no idea what that means, but it looks like they put some kind of cushion or foam inside the wheels, to absorb road vibrations.

I would say that they successfully reduce around 60% of road vibrations. But you shouldn’t expect them to be as comfortable as an All-terrain pneumatic tire, those are a night and day difference.

Cloudwheels help to reduce a portion of the road vibrations, making riding on rough roads bearable. Pneumatic wheels, on the other hand, basically cancel out all road vibrations and are way more comfortable.

Testing Various Surfaces

On sand, Cloudwheels just roll and do their job without a problem. They grip more, so they spin well on sand compared to street wheels. But I wouldn’t try to carve on sand, it’s still slippery and you will probably fall down. 

On Grass it will spin well, if your motors have the power and torque to do so.

On small pebbles, the Cloudwheels perform okay. I would not call them comfortable, but it’s not that bad.

On rocks and small stones, it’s a different story.  You’ll end up with a headache because the vibrations are too strong.

It’s just not meant for riding on that type of material. It would be terrible for beginners especially, but I wouldn’t recommend it at all since you could fall down.

So, naming the Cloudwheels ‘all-terrain’ is a bit of an exaggeration. Instead of calling them ‘All Terrain’, I would have called them ‘Hybrid wheels’, meaning that they are between street and all-terrain wheels.

What makes Cloudwheels unique

To understand why Cloudwheels are special, you need to understand the difference between street wheels and all terrain wheels.

Street wheels are fun to ride because they free roll very well without resistance. They give you the most torque and highest top speed. They are also lightweight, so you’ll achieve maximum range, but they suffer on rough roads.

AT, or all terrain wheels, on the other hand, are very comfortable, but they will effectively cut your maximum range in half. If your board is able to go 30 miles (50 km), you’re only going to get about a 15 mile (25 km) range. AT Wheels also grip more, so they free roll less, meaning that they are slow. Another problem is that AT wheels are very large, and can only be used on giant boards, like the Ownboard Bamboo, WowGo at2, and evolve GTR series.

This is where Cloudwheels come in. They sit between street and AT wheels. They are more comfortable than street wheels, but not as comfortable as AT wheels. But the best part is that you can use them on almost all boards that use a belt-drive setup.

They also don’t add much weight, so your range will only be reduced by a small amount.

Here is an example of the Exway Flex Riot. You can see that they can’t use AT wheels because they simply will not fit.

For boards like this, using cloudwheels is the best option if you are looking to reduce road vibrations while riding.

The original cloudwheels that I have were not very durable and chipped easily. However, after testing these I can say that this new version survived my tests.

I tried to destroy them by riding off-road, but surprisingly there was no chipping at all. 187 miles (300km) on rough roads and they still look brand new.

So, are cloudwheels perfect?

The answer is no, and here is a quick list of the small sacrifices that you will have to make.

First, due to the tread pattern on the wheels, Cloudwheels free roll less than street wheels, and because they roll less, you will lose a bit of range

Second, on wet roads, just like any other PU wheels, they are slippery. The best wheels for wet roads are rubber.

Third, you will lose a little bit of torque when you switch from street wheels to cloudwheels. It’s not really noticeable in a daily-use scenario, but it is most noticeable when going uphill.

So, what’s the verdict?

The new Discovery Cloudwheels by iWonder are great, and I consider that the sacrifices are pretty small.

They fit most boards. They Look good. They come in different colors to match your board and enhance the aesthetics.

The Cloudwheels give you a slight increase in top speed, and most importantly they perform great on rough roads, especially on boards that can’t use the full-size all terrain wheels. This is the best choice currently available. They aren’t true all-terrain wheels, but if you are skilled you can make them work.

By the way, the Cloudwheels come in two sizes: 105mm and 120mm. Choose the 105mm for boards like the Exway Flex, Backfire Zealot and WowGo 3x. Pick up the 120mm for big boards like the Evolve GTR.

And if you are from Malaysia, be sure to check out our online store @ https://electricskateboardmalaysia.com/ when you want to grab something! Cheers!

If you are interested in buying a Cloudwheel, be sure to check out our affiliate discount link here and uses code: “ESKATEHQ” during checkout.
It will help you get a small monetary discount ($10 off) and helps us out too. On top of that, you’ll be tagged as an Electric Skateboard HQ customer and probably be treated better. Cheers!

That’s all for this review! If u have any questions, please leave a comment below!

The Winter Eskater’s Guide to Jackets

It’s that time of year again folks.

North America is beginning to ice over, the days are getting darker and shorter, and the majority of eskaters are packing it in and getting tucked into their computer chairs, preparing to argue with each other on Reddit for the next 5 months.

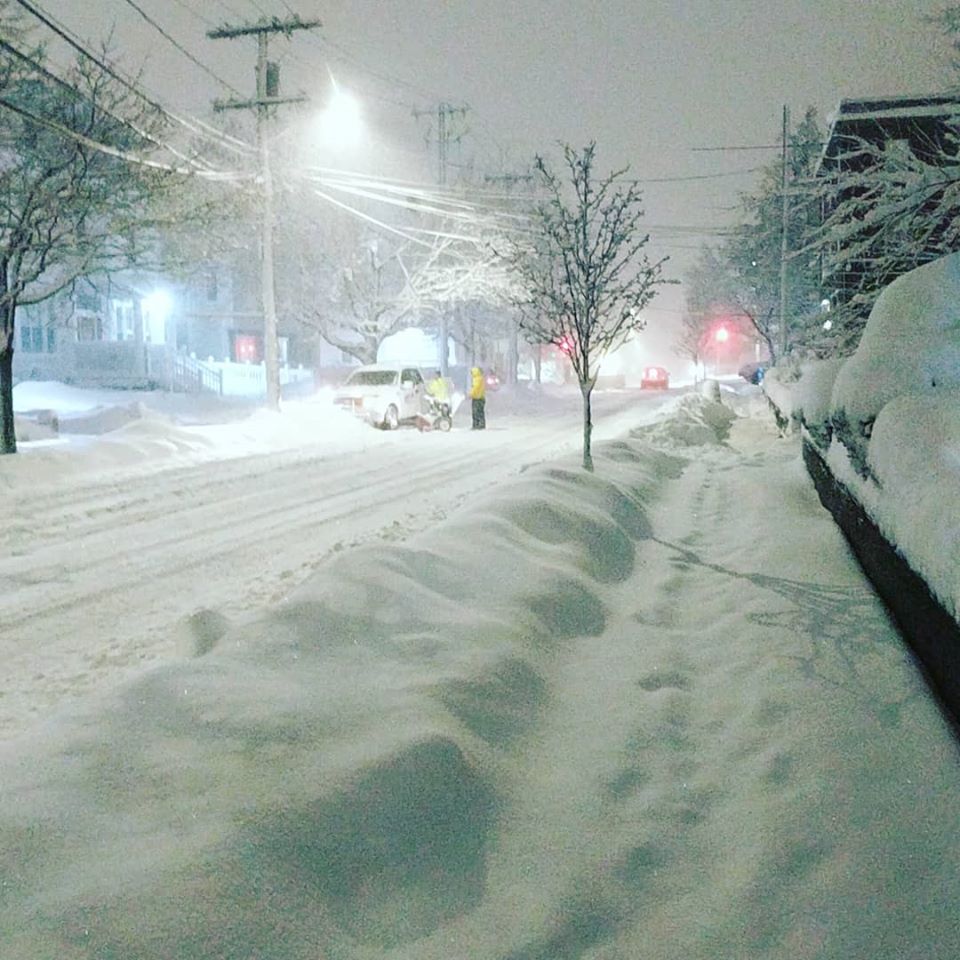
(Yes, this is where I live and yes, I did ride that day)

This is also the time of year when the hardy among us get in some of the most intense, exciting, fun, and at times, serene rides of our lives. I am a staunch advocate for eskating in the winter time. There is something strangely satisfying about floating down the street on my EUC alongside banks of snow, while surrounded by Christmas lights, with the smell of a wood fire lingering in my helmet.

Of course, this is not possible with your run-of-the-mill outfit. The clothing required for winter riding must be as specialized, hardy and deliberate as the brave men and women who choose to ride in these conditions.

Seeing as this is my third winter commuting in New England snow, I figured it was about time that I begin to share some of the knowledge that I have gained over the past couple of seasons. It’s tough enough to ride along through the cold nights of winter, so let me try to make that journey a little less cold, and lonely, by sharing my experiences with winter gear so that you can learn from my mistakes and excel from my successes (and look at that sweet, sweet gear porn)

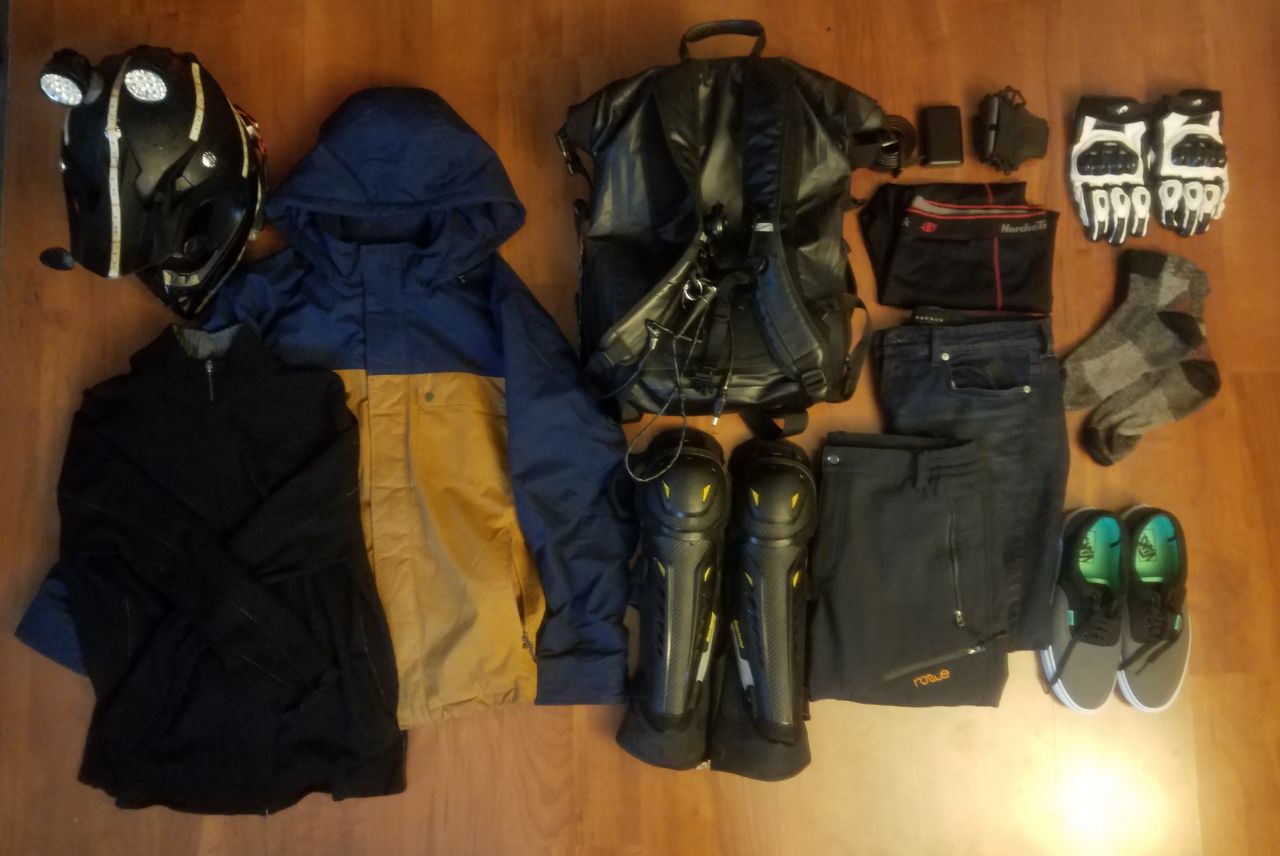
(Boston rider “Ghost” was happy to snap his winter load-out for our guide)

To kick-off the guide, I will start by talking about the core of every winter warrior’s arsenal, the jacket. But not to worry! In future weeks, we will go on to tackle the topics of gloves, shoes, pants, and head-wear.

The Jacket


(Rarely captured footage of the NYC eskate crew voguing) 

I have seen winter eskaters in all manner of jackets, from the thin flexible Columbia fleece, to the giant Canada Goose Arctic Expedition parka.

For the purposes of this guide, I will try to call out the features that I find make the best eskate jacket, rather than the particular models of jacket that I recommend (though I will give some specific recommendations as well).

The Must-Have List:

The perfect eskate jacket should have the following features:

-Cuts wind
-Insulates you to keep warm (down is key here)
-Covers and seals at your neck
-Covers some of your upper leg
-Resists abrasion if (god forbid) you take a digger on some stone-cold asphalt
-Is waterproof

Since wearing a full-face helmet is one of the easiest ways to keep your head warm during cold weather riding, a hooded jacket is not necessary, and may even get in your way unnecessarily. I personally recommend looking to cold-weather motorcycle and snowmobiling jackets for eskate purposes. These jackets typically feature warm, wind-proof design with a tight fit around the neck, and occasionally have some armor built in as well.

Baby, are you down, down, down, down, down.

With regards to warmth, down is king. Pound-for-pound, down is warmer than synthetic material, which means that less can be used to keep you warm. This means a jacket filled with down will be warmer than if the same amount of synthetic insulation were used and allows you to be lighter and less bulky on your commute.

Some things to keep in mind:

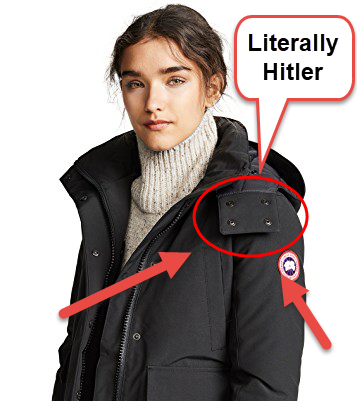
-If your jacket features flaps on the side of the hood with buttons on them (such as in the above image), they will flap against the side of your helmet at speeds over 20 mph and drive you insane. Ask me how I know.

Some motorcycle jacket manufacturers *ahem* Revzilla *cough* insist on adding these, non-removable, “features” to their motorcycle jackets, so it is important to keep an eye out for these flaps when purchasing a jacket online or in-store.

-If your jacket has tight fitting or bulky cuffs, you may be unable to comfortably fit gauntlet-style gloves into/over them. Typically sizing up your jacket from what you normally buy will prevent this issue (and leave you some room for additional base layers.

-Days get shorter in the winter, so you may find yourself riding in darker conditions more often. Choosing a coat in a brighter color, or finding a model with reflective piping can be the difference between a driver seeing you on a dark roadway or not.

My Recs:

I have had particularly good luck with the following jackets:

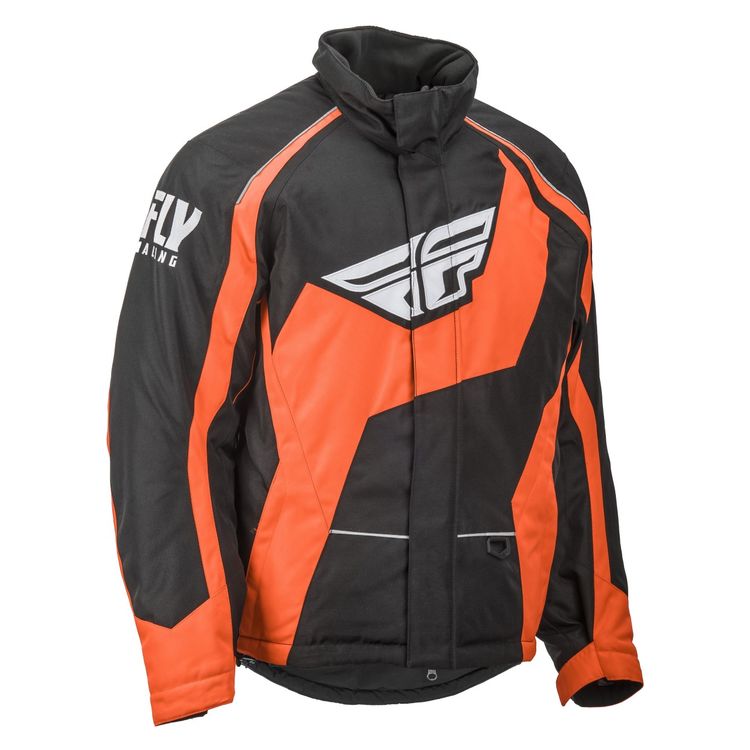
The Fly Racing Snow Outpost Jacket

This jacket features a very warm, snow-mobile centric design that keeps wind out, particularly well at the neck, and features reflective piping and bright colors that will make you stand out like THE GODDAMN SUN when car headlights hit you. No, I am not exaggerating, this jacket makes you look like a part of an EDM festival at night, and remains quite visible during the day (at least in the bright orange color that I chose).

It also features reinforced seams as well as reinforced panels to prevent wear from (it’s like they made this for eskating) backpack straps, as well as on the elbows and forearms. This jacket also has one of the best collars for eskaters that I have had the pleasure of using. It comes up nice and high to meet the bottom of your helmet, and features insulation all the way to the edge of the collar. This ensures that your neck is toasty warm and that pesky, cold winter air has even less space to get in. I ride with this jacket into 10-20 degree fahrenheit conditions without issue.

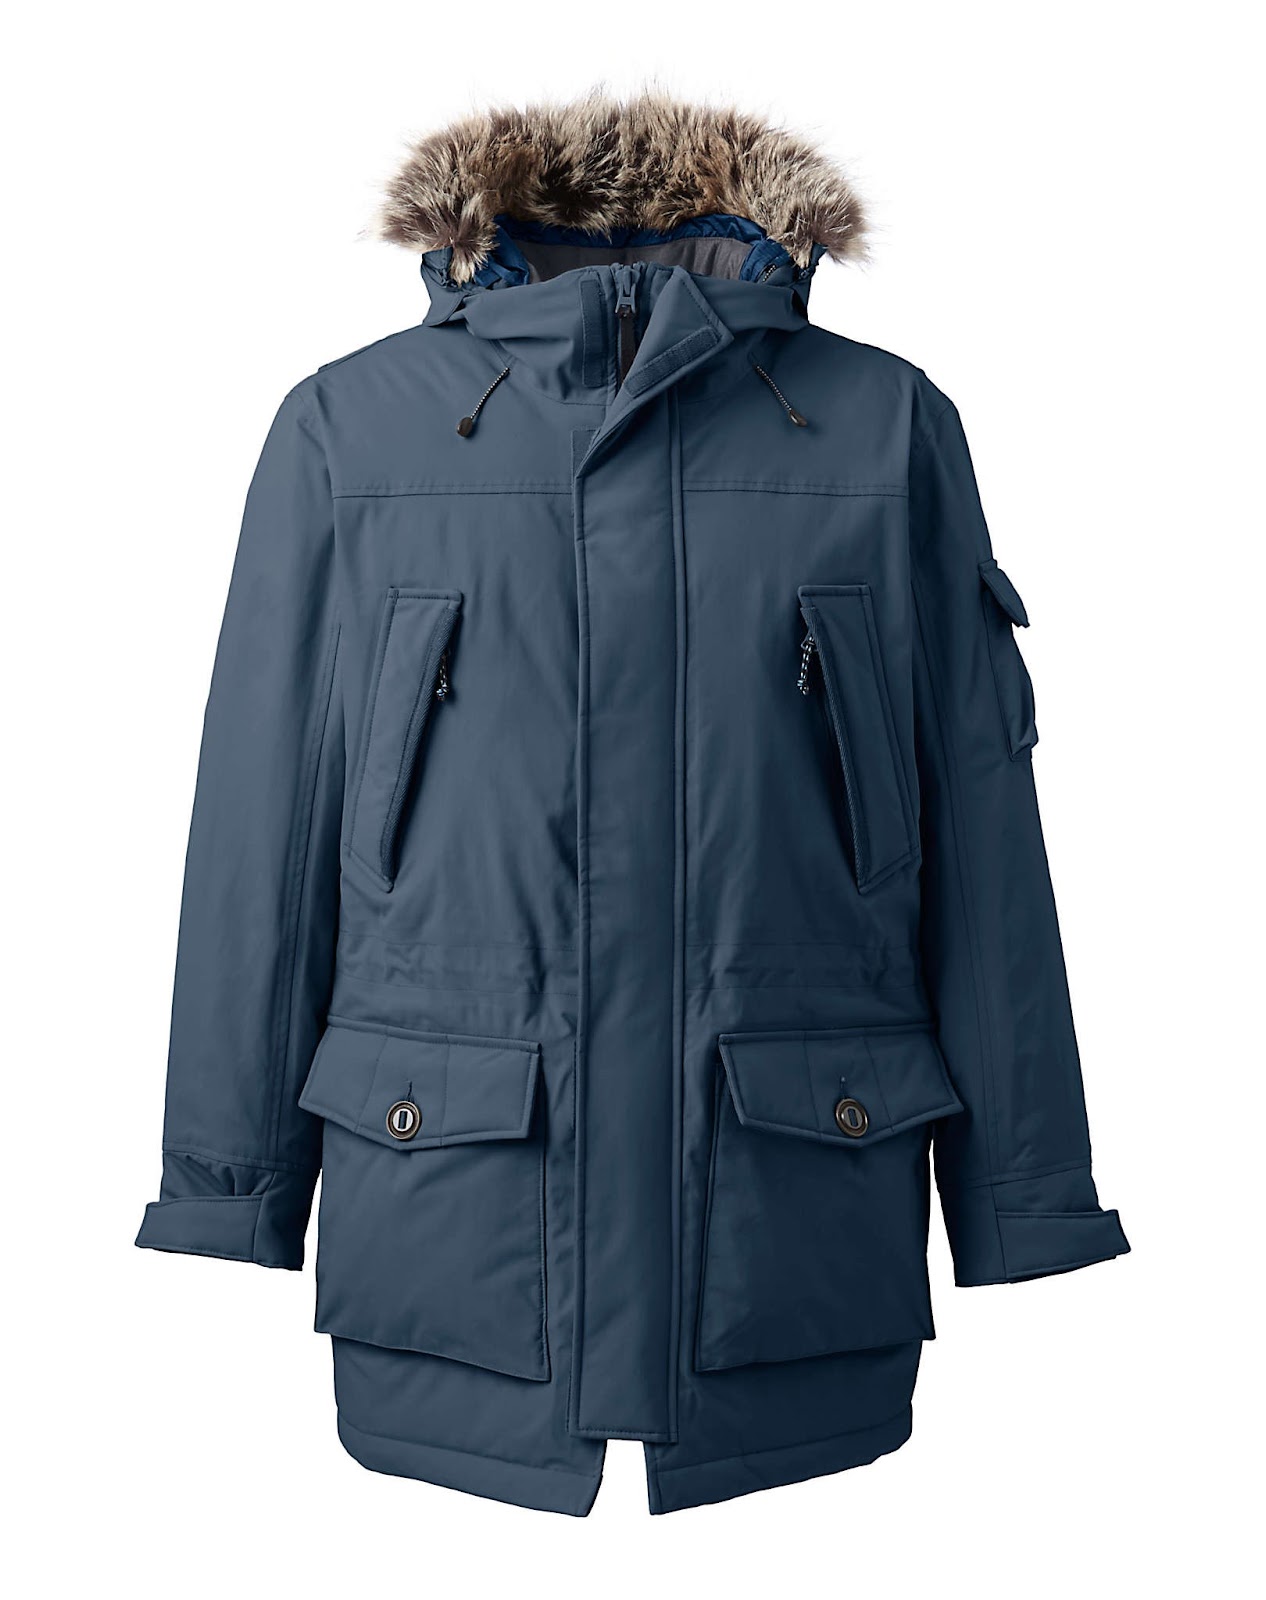
The Land’s End Expedition Winter Parka

When winter gets REALLY cold, I always find myself turning to this coat. With a temperature rating from -34° to -5° Fahrenheit, a 100% waterproof shell with seam-sealing, and 600 fill power down with a downproof quilted lining, this jacket is a godsend. The 100% nylon shell ensures that it will stand the test of time and abrasions that you might run into on the road. The ample pockets ensure that you have room for all of your eskate gizmos and gadgets (I hardly ever need to bring a backpack along with this jacket).

All of these features are great, but one of the best features of this jacket is its optional “Tall” cut. I HIGHLY recommend that you get this jacket in a “Tall”, unless you are fairly short, as it extends the bottom of the jacket to cover some of the user’s upper leg as well. One of the biggest problems with riding at-speed in the winter is wind-chill, and the part of your body that will feel this the most, from my experience, is the front of your thighs. Having a jacket that can cover up this key vulnerability is an invaluable tool for an eskater, and a feature that makes this jacket the core of my winter arsenal

TL;DR

Get a coat that:

  • Is long/large enough to make room for layers and covers your waist
  • Is abrasion resistant
  • Blocks wind
  • Is waterproof
  • Has goose down for maximum warmth
  • Covers your neck and seals tightly to prevent wind egress
  • Has bright colors and/or reflectors for nighttime visibility
  • Does not have the “hood flaps of doom”

As always, I would love to hear your thoughts on winter commuter gear. Feel free to comment on this article with your favorite pieces of winter gear and I will make sure to include them in the guide.

Until next time, stay warm out there skaters!
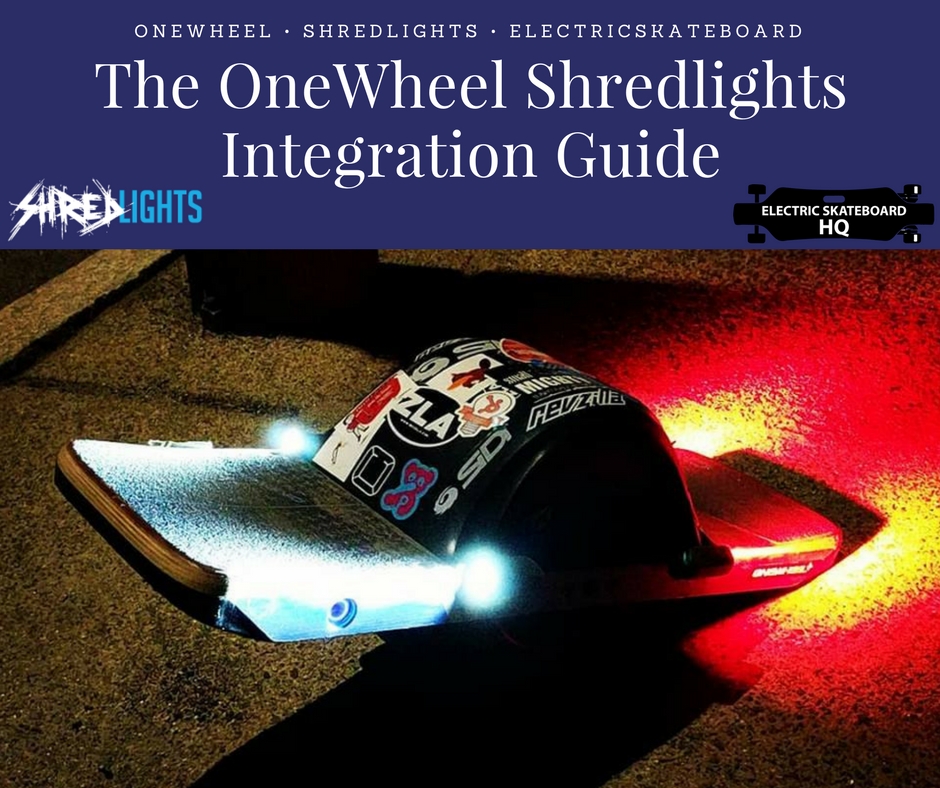
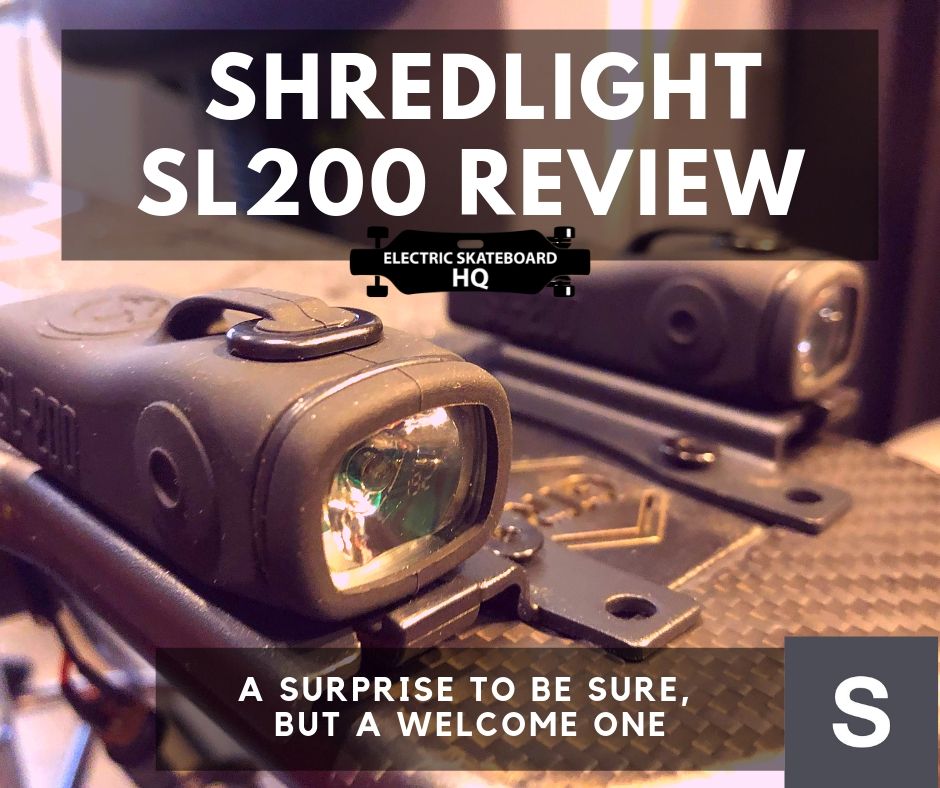
Shredlights SL200 – A Surprise To Be Sure, But A Welcome One

First, A Forward

I don’t typically review accessories as I don’t usually accessorise a whole lot when I skate. The most I usually do are helmets, pads, and gloves. I think accessories are fairly personal things and people may or may not like something based on their own personal perferences. Pads and gloves are obvious items here. But what about lights? Lights are fairly universal with specs that can be objectively discussed. This is why when Shredlights asked if I would like to take a look at the new SL200, I agreed to write my thoughts down. So, without further ado, let’s jump right in.

Shredlights sent me a big box

Yeah. I thought they would just send me a pack but instead they sent me a big box of like a bazillion lights. There were Action Packs, Combo Packs, Night Ops Packs, and a buttload of mounting brackets for basically any kind of board. There was also a stack of stickers included which I certainly appreciated. Did you know each sticker on your board adds 5MPH to your top end?

Let’s talk about the mounting system.

The original Shredlights were possibly the most popular eskate specific lights in the world. The mounting system that screwed in using the existing hardware mounting screws on your board was innovative and convenient at the time. However, reports of light housing rubber tearing due to fatigue and lights falling off mid-ride started appearing. The double hook system itself wasn’t very easy to take on and off either, and was disliked by not a few people, myself amongst them.

So what’s changed there then?

Well, the mounting system has been completely redesigned. Folks, I would be very surprised if your lights fell off. It’s very rock solid. Instead of stretch-the-rubber push-pull-help-how-do-I-get-this-off-oops-I-tore-the-casing, it’s now a slide on and spring-loaded click-in. The new mounting plates are more robust as well. Thicker steel is now used, and the mounting plates now have a matte finish instead of the glossy black paint they used previously that liked to chip off. The variety of mounting configurations also impressed me. There are flat mounts, vertical mounts, and diagonal mounts. They’ve really thought of everything this time.

In addition to board mounts, Shredlights have also gotten into mounting on other objects and surfaces. In the Night Ops pack, they include a bunch of different mounting plates and clips that can stick onto various surfaces. The most notable thing is Shredlights have decided to use GoPro style pivots. This means you can buy any accessory that’s got a GoPro pivot system on it and it’ll fit right away. I think this is a great decision and really increases the usability of the product.

One last thing worth mentioning is the clip mount. This is possibly my single favorite improvement of the SL200, and is really what makes the product for me. The clip clips onto most anything, but I most often clip it onto the strap of my sling bag at night. The clip allows for near 360 degrees of freedom for you to angle the light, and is a great solution when riding with others as for me it is often annoying to have lights mounted on the helmet because when you look at somebody you might blind them.

Speaking of the lights…

All the best mounts in the world would be moot if the lights didn’t perform right?

Well, I’m glad to say they perform, and perform well. In my personal testing, my single backpack strap clipped SL200 effortlessly lit up the road around 20 feet in front of me with a constant-on beam to a satisfying degree. That’s a win in my book. On the highest constant brightness setting, one light lasts a few long rides before needing to be recharged. That’s another win in my book. So much better than the V1 Shredlights already.

Now, I don’t really like putting lights on my board, so I only have cursory first hand experience with board mounted lights. However, my good friend and esteemed videographer Justin Yee is an avid user of the V1 Shredlights, so I gave him a set of front and back SL200s to test on his eskating adventures. Here’s what he said (paraphrased):

“They’re way brighter than the original. It’s got really sick light patterns, and the new mounting mechanism is great. The new charge port covers stay great and don’t tear off. They light up a lot more of the road compared to the old ones, now you can actually see bumps and cracks and have time to react. The rear lights are also very noticeable. I have no complaints. Steep price but for the convenience and function I’d say worth if you like having lights on your board”

To sum up,

What we have here are bright, quality, durable lights purpose made for eskates and eskaters. At $100 for two front lights, two rear lights, and mounting brackets, it might seem a little steep. However I think what you’re really buying into here is an ecosystem, and personally I think it’s a really flexible ecosystem and a great choice of lights. I was certainly surprised by the quality and performance, and I think you will be too.

Click here to check out Shredlight!
Use promo-code: ESKATEHQ to get 10% off